
It only took 10 years of living in this house with an actual pantry to figure out how to organize it!
Take a look at this before shot - so gross:

You can sorta tell I was trying to keep the stuff organized. Similar items are corralled near each other, but there was no real organization. I had some bins for flour/sugar/snacks, but the bins were all different sizes so they didn't stack very well, and some had lids/some did not. If there was a sale on canned vegetables and I stocked up, they were put on different shelves wherever there was space. I never knew what I had, which made putting together meals difficult.
It was just not working for me. So let's fix it!
First, I took everything out and threw away anything that was expired/about to expire as well as items we would never use (I'm looking at you, big crinkly bag with exactly 4 croutons inside and 'Christmas in a jar' that I'll never simmer on the stove).
Then I put everything into these categories to figure out how much real estate I'd need to dedicate to each:
- baking sundries - extracts, baking spices, baking soda/powder, cocoa
- baking dry goods - open flour/sugar/powdered sugar
- backup baking dry goods - sealed packages of flour/sugar that I'm not currently using
- grains and starchy sides
- peanut butter/honey - this probably won't need its own category in anyone else's house, but I'm a fan of peanut butter ;)
- bulk bins of salt & pepper
- breakfast - cereal, oats, pancake mix
- chips and snacks
- canned goods
- pasta
I asked for a 3-tiered can stacker/organizer for Christmas last year (and got it!) so canned goods had a plan. Also, I knew I wanted to move all my dry pasta and open containers of baking dry goods to some glass jars I had been purchasing over the last few months from IKEA. I picked up a few every time I went in different sizes with the beginnings of this pantry makeover idea in my mind. Don't they look so cute?

{Note} If I were super DIY OCD I'd put chalkboard labels on the jars like everyone else in the blog world, but if
you can clearly see that it's quinoa vs. orzo, why do you need a label? If they were frosted glass, go for it!
Once my cans and jars were ready, I went out in search of some bins for everything else - 4 small and 2 large. If I were doing this project now I'd get them at Dollar Tree ( I am obsessed) but at the time I went to Big Lots and found 4 identical bins that looked like the perfect size for my smaller categories. They didn't have any larger bins in stock, but I knew that the 2 larger bins would be together on the top shelf, so they could be different in style without making me twitch.
I used those 4 bins for baking extracts, grains/starches, backup dry goods, and pb/honey/salt/pepper:
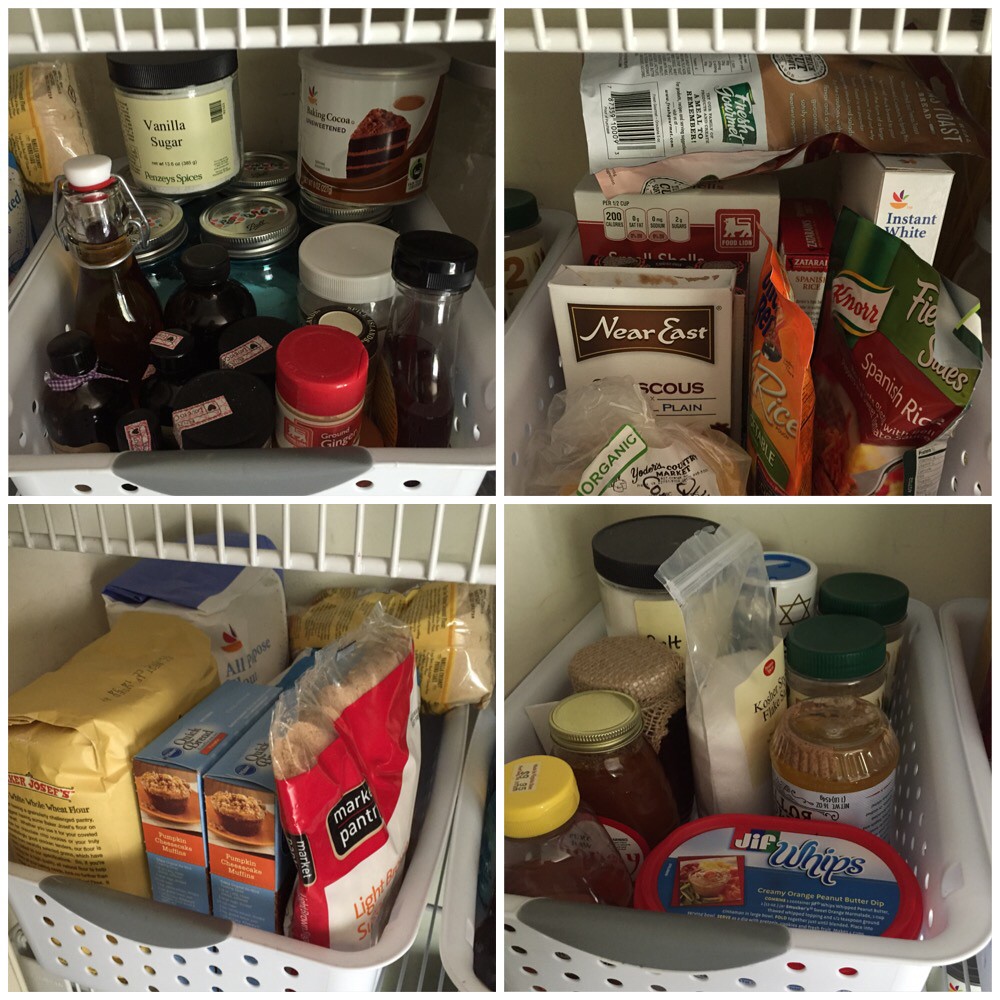
I found the top 2 bins at Target for way more than I would have paid at Big Lots for matching ones, but whatever. They look complementary at least. As you can see at the top left, we clearly have a chip problem. Top right is breakfast stuff. There is 1 random bin beside the can organizer that has snacks like granola, dried fruit, and almonds. Since snacks like that tend to rotate pretty quickly in this house based on our current cravings, I just used a plastic shoebox sized bin because it fits well in that corner.
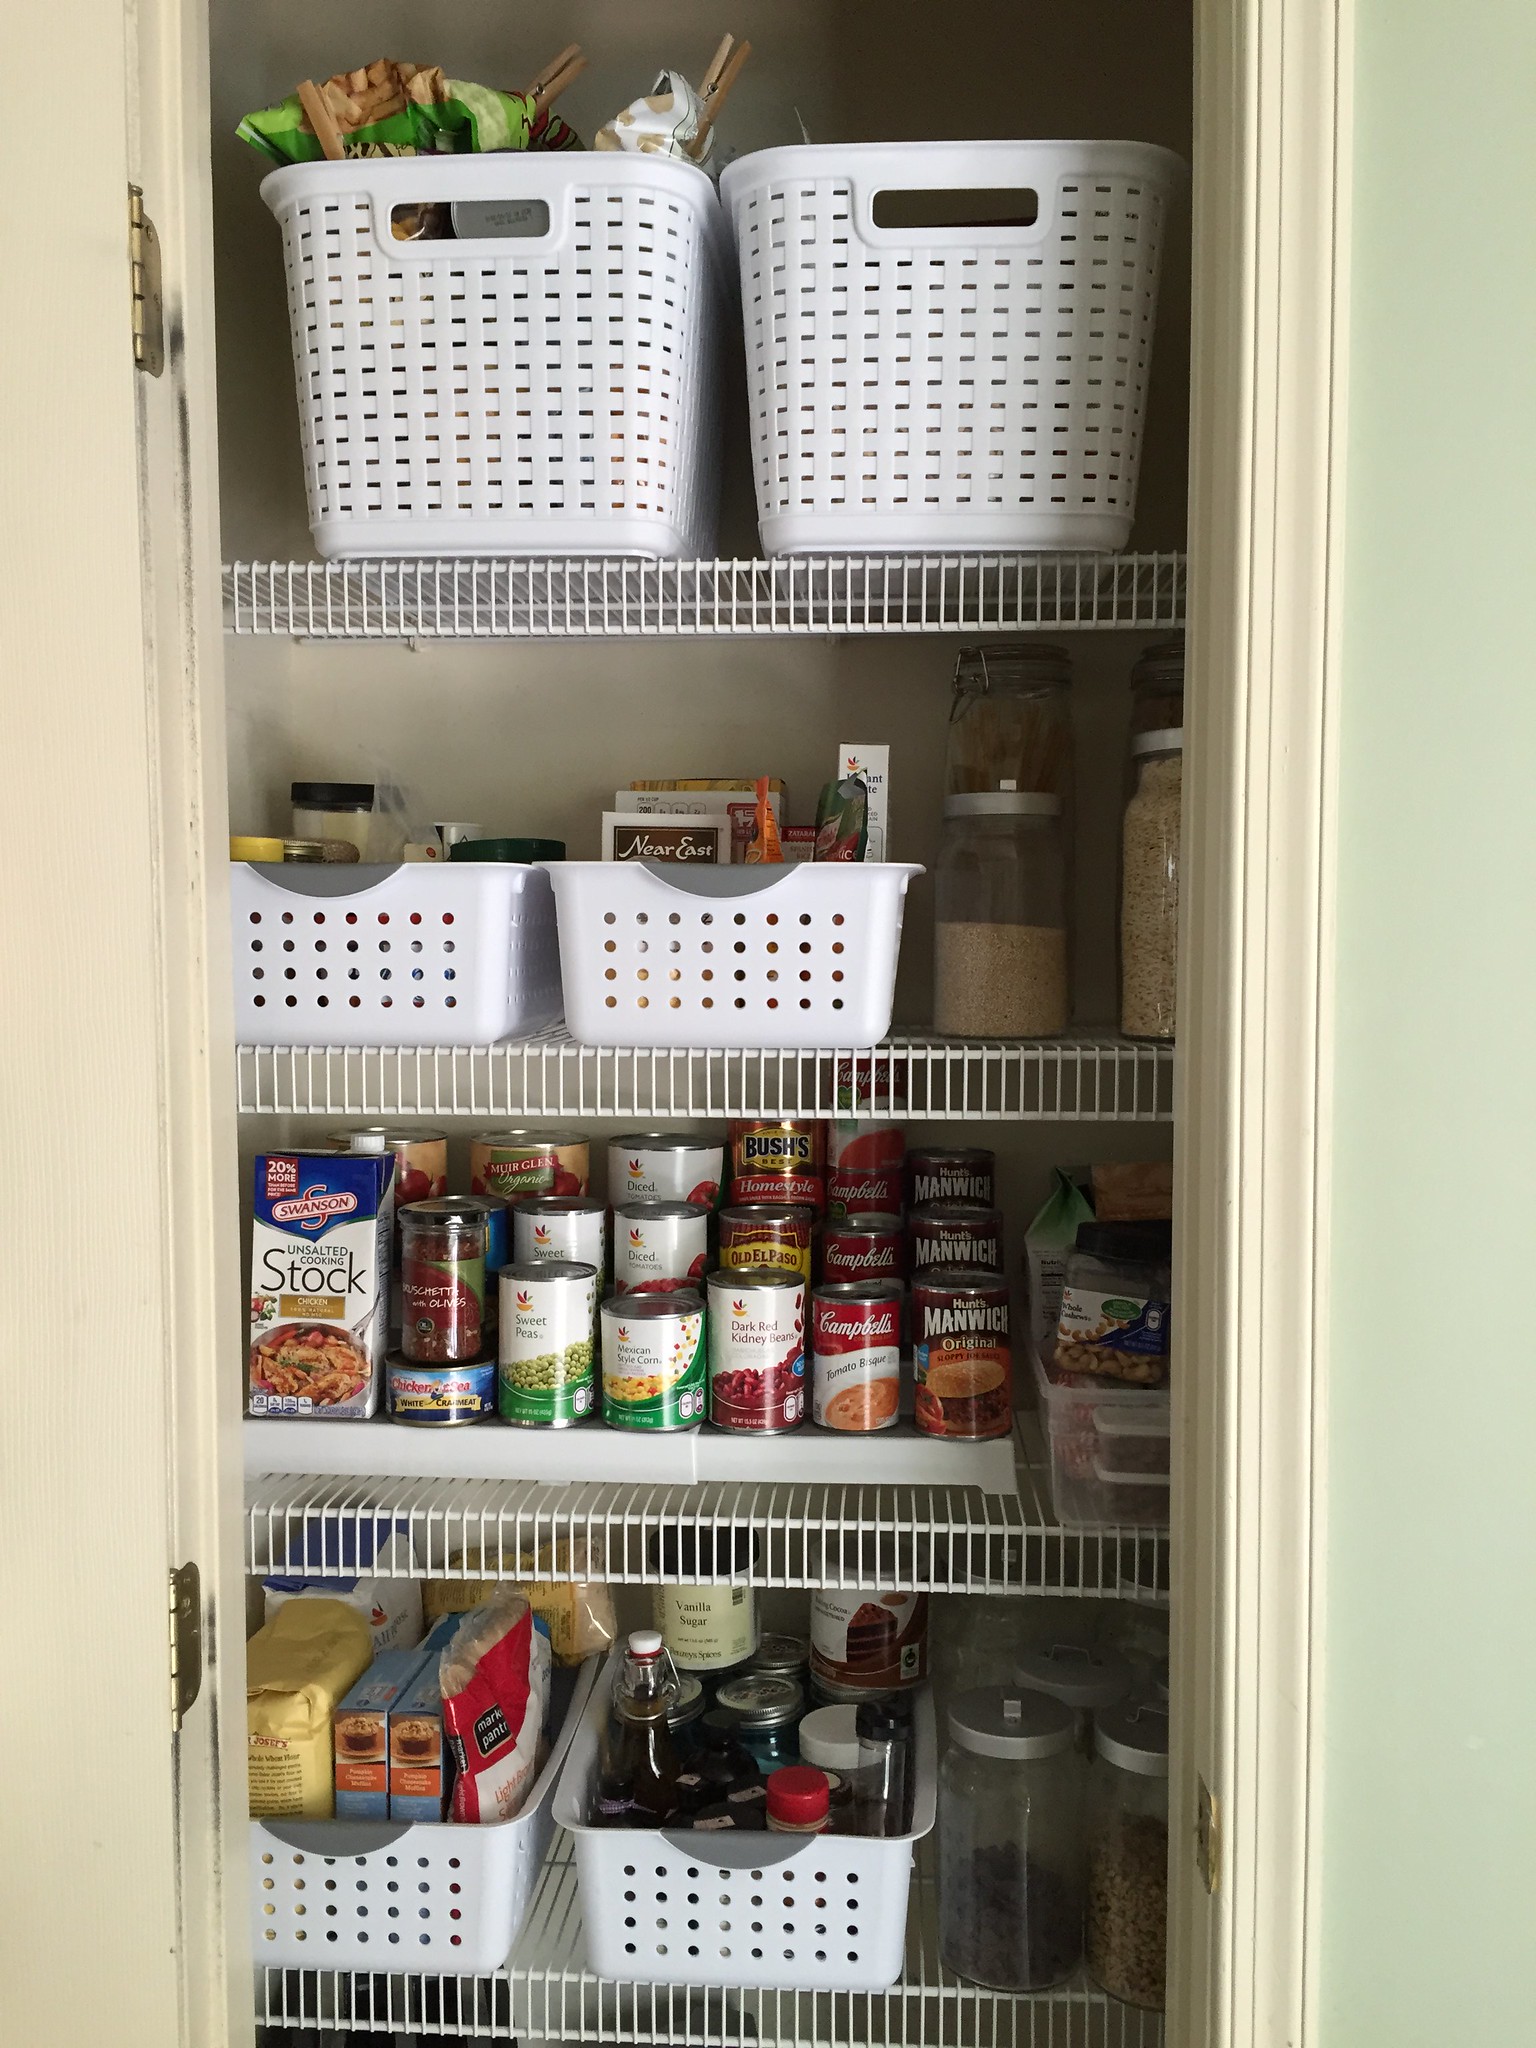
So there you have it. Our working pantry system. Now when Dave needs something he can find it, and when I'm meal planning I can easily see what we have and need!
No comments:
Post a Comment